The fanfare of the iPhone 6, iPhone 6 Plus and Apple Watch announcements have barely died down, but it’s now time for current iPhone and iPad users to blow somewhere in the region of a Gigabyte on getting the fruit company’s next big operating system upgrade: iOS 8.
While you can find out most of what you need to know about the new features over here, I’ve put together is a brief guide on how to update to iOS 8 for your Apple smartphone and/or tablet.
Step 1: Wire-up for WiFi… and wait
This update’s a big one, so you’re not going to want to burn mobile data on it. Make sure you’ve got access to a speedy WiFi connection, either for your computer or the iOS device you’re planning to update. And expect to be around for a while.
1GB of data will take you somewhere between 30 mins and 2 hours, depending on what the actual throughput of your line is. Thankfully Apple distributes its updates and other essential patches over a CDN (content data network) that has a point of presence in every major centre in the world.
We have one close to South Africa, so the downloads tend to be quick.
Step 2: Decisions, decisions
You need to make a call between doing the update straight on your iOS device, doing the update on iTunes during an everyday sync, or downloading the file to your computer (it doesn’t matter whether you’re on a PC or Mac) and then updating your device manually.
If you do the update on your iOS device, you’ll be downloading a ‘delta’ of the update – only the files that are required for the update – instead of the whole operating system image, which is what you’ll get if you do the update in iTunes or download it manually to your PC.
The first option is better if you’ve only got a single model of iOS device, like for example, one iPhone 5s and one iPad Mini. The second option is better if you’d like to make a detailed backup of your device (and still, you only have one unit of a single model of iOS device) .
The third option is only useful if you’ve got two iPhone 5s units, or two identical generation iPad Minis (the size of the Flash storage doesn’t matter).
With the two former methods, the update is downloaded (regardless of whether you do it on your iOS device or through iTunes), installed on the device and tossed.
If you grab the update file, you can re-use it, providing it’s for the same model of device. In other words, the 5s file only works on 5s, and the 4s file on 4s.
You get the picture.
I’ve kindly put the links to the individual files in the ‘Doing the Download’ section below so you don’t have to search like crazy for them.
Step 2: Back it up
Now that you know how you’re going to proceed, the next step is to get your data backed up. While I’ve never seen one of these updates go awry and the user’s data shredded, you hear nasty stories every day…
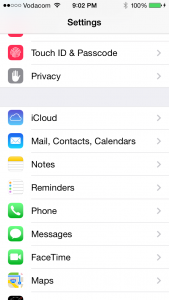
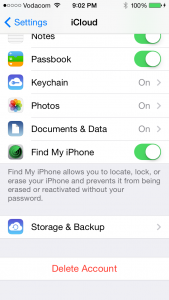
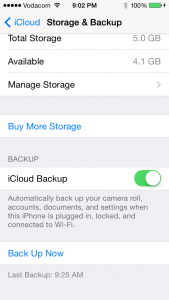
Again, here you have options. Either connect your iOS device to your instance of iTunes and do a sync (just make sure the backup option it ticked in iTunes) or go into the device’s settings, look under ‘iCloud’; ‘Storage & Backup’; toggle the switch next to ‘iCloud Backup’; and hit the ‘Back Up Now’ option.
If you choose the first option, you may as well grab the update at the same time.
Don’t stress too much about how and where to find it. iTunes will detect the presence of an update online and prompt you to do the upgrade. Just follow the instructions.
Once you’ve done a backup using either of these methods, it’s time to get things downloaded and installed.
Step 3: Doing the Download
Here’s where the fun begins. Remember which option you chose a while back?
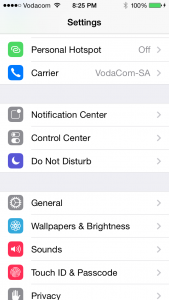
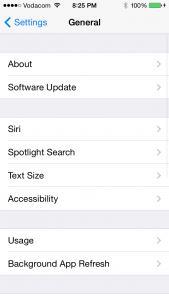
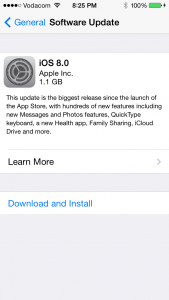
If you chose to direct download the upgrade to your device, all you need to do is head into your device’s settings, look under ‘General’; ‘Software Update’; let it check for the update and once it’s found it (it will be called iOS 8.0) hit the ‘Download and Install’ button.
If on the other hand, you were looking to use the iTunes method, connect your device to your computer, perform a sync through iTunes and follow the instructions. iTunes will guide you through the process step by step.
If you want to download the file to roll out to multiple same-generation iOS devices, you need to use one of the links below.
These links go directly to Apple’s downloads and were found on http://www.redmondpie.com who are generally the go-to guys for this kind of thing.
Just a note: make sure you ctrl-click on the file so you have the option of choosing where to save it. And obviously, you should save it somewhere logical, like your downloads folder.
- iPad Air (5th generation WiFi + Cellular)
- iPad Air (5th generation WiFi)
- iPad (4th generation CDMA)
- iPad (4th generation GSM)
- iPad (4th generation WiFi)
- iPad mini (CDMA)
- iPad mini (GSM)
- iPad mini (WiFi)
- iPad mini 2 (WiFi + Cellular)
- iPad mini 2 (WiFi)
- iPad mini 2 (CDMA)
- iPad 3 Wi-Fi (3rd generation)
- iPad 3 Wi-Fi + Cellular (model for ATT)
- iPad 3 Wi-Fi + Cellular (model for Verizon)
- iPad 2 Wi-Fi (Rev A)
- iPad 2 Wi-Fi
- iPad 2 Wi-Fi + 3G (GSM)
- iPad 2 Wi-Fi + 3G (CDMA)
- iPhone 5 (CDMA)
- iPhone 5 (GSM)
- iPhone 5c (CDMA)
- iPhone 5c (GSM)
- iPhone 5s (CDMA)
- iPhone 5s (GSM)
- iPhone 6
- iPhone 6 Plus
- iPhone 4s
- iPod touch (5th generation)
Once the file has safely downloaded (it’s 1.7GB so be patient), you’re going to need iTunes. So fire it up and move on to the next step.
Step 4: Updating from an image through iTunes
If you’re planning to install the new OS on multiple devices, you’re in the right place. Just repeat the steps from here on in, once you have the file.
First, make sure iTunes is fired-up. Now connect your iDevice to your PC using the appropriate cable. Straight away, iTunes should prompt you to do a sync, detect that there’s an update and ask you whether or not it should proceed with the update.
Hit cancel. If it didn’t prompt you, don’t stress.
Hold down alt (ctrl on a PC) while clicking on the ‘Check for Update’ button. This should cause a file dialog to be launched. This is the part where you navigate to the place you saved the iOS 8 update (it will have an ‘.ipsw’ file extension) and select it.
Now all that’s left to do is follow the on-screen instructions. If you’re going to use this method, you need to have done a backup like recommended and outlined above, as this will wipe the device and restore it to a factory state, albeit with iOS 8 on.
Step 6: Now, have a look around
All that’s left for you to do is enjoy the new software. There’s a pretty thorough overview of the new features right over here.


