
The latest raid in Destiny 2, the Vow of the Disciple arrived in the game on 5th March, but thanks to rampant power cuts and loadshedding, I only completed my first run of the raid two weeks ago.
By now there are numerous guides and strategies that can help you clear the encounters in Vow of the Disciple and this story is neither of those.
To be honest, this raid can be frustrating because it demands flawless execution of the various mechanics in order to progress. Throw in a damage check or two and you have a raid that is fun, but will test you.
So what is the secret to beating this raid? Well, after completing three runs of the Vow of the Disciple I can confidently say that it’s about embracing the chaos.
The Raid hides its true nature in the first two encounters. The trip through the Disciple’s Bog on the bus is rather simple. Stay near the bus until the Knowledge Bearers are gone and then collect knowledge.
The second encounter, Acquisition, teaches players the symbols they will be using throughout the Raid and while the final floor and final stand with The Caretaker can become chaotic it’s nothing compared to what awaits you.
Where things start to go downhill for many fireteams is Exhibition.
In this encounter teams need to rotate a series of Relics that have been used in previous Destiny 2 Raids.
There is the Nut from Leviathan’s Gardens encounter, the Relic from Vault of Glass, and Taken Strength from Last Wish. But what makes this encounter so chaotic is the fact that teams need to split up with relic carriers needing to zig zag between the various rooms that make up this encounter.
Add to this the need to call out symbols on the fly, find the common symbol and then needing to repeat this while a timer ticks down, you have pure chaos on your hands.
While there are ways to cheese this encounter, even those are hit and miss and there are no cheeses for what is to come in Rhulk.
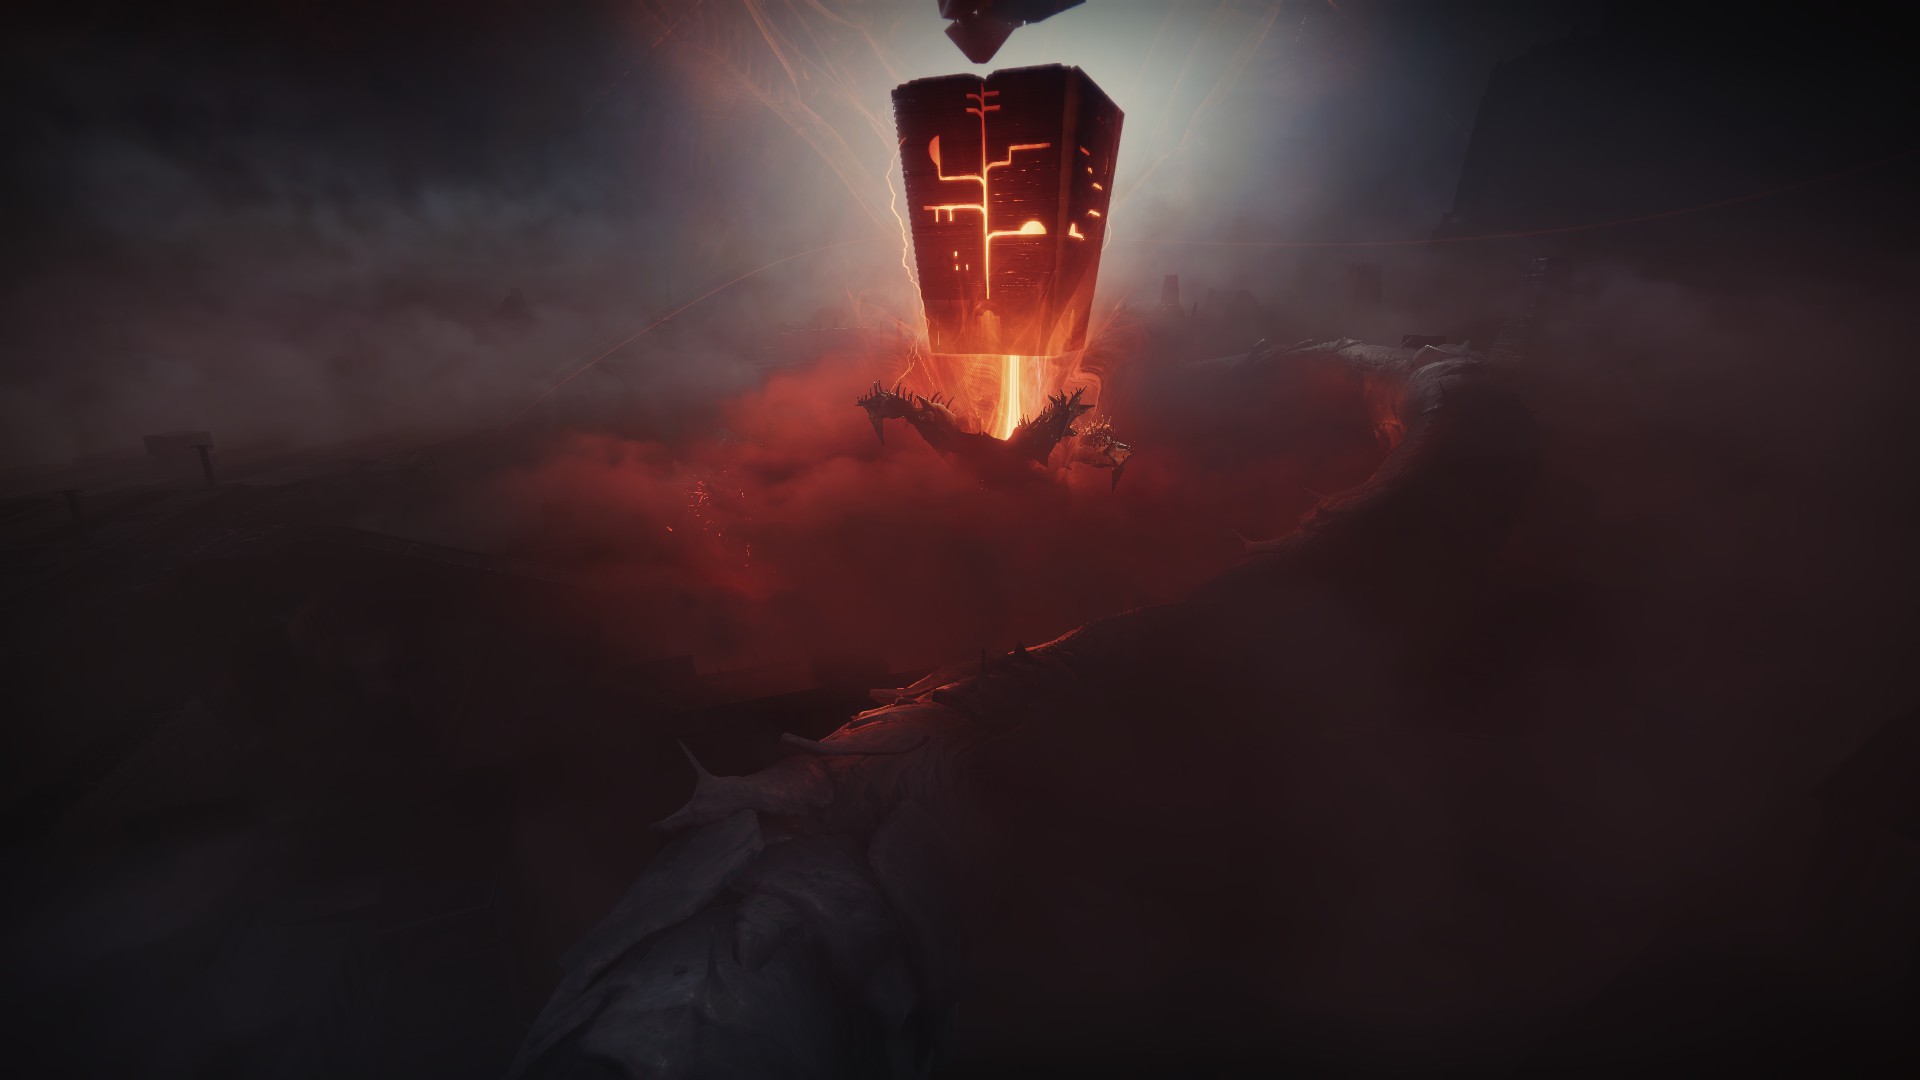
The first stage of the final fight with Rhulk is pretty chilled out. For the most part you’re just cycling Leeching Force, obtaining Emanating Force and triggering a pillar. Where things become chaotic is when teams hit the damage phase.
In order to get to the DPS check one player needs to obtain Leeching Force, turn that into Emanating Force and then trigger one of four pillars in the corners of the arena. Doing this four times triggers the damage phase but if somebody other than the person elected to grab Leeching Force, which is very easy, things can turn chaotic very quickly.
Even worse, once the final stand phase is triggered, Rhulk becomes a madman charging anything that catches his six eyes.
In every run we have done of this Raid, our best laid plans have been thrown out the window because somebody accidentally shot something they didn’t or didn’t check or call out a symbol correctly.
It can be very easy to get frustrated and flustered in these moments. A necessary skill to overcoming this Raid and getting a shot at a Collective Obligation drop is being able to adapt on the fly. Granted this isn’t always easy because being able to adapt means every member of the fireteam knowing the mechanics and what to do when X or Y happens.
To close off, I’ll share some strategies below that my fireteams have used. They may not be the fastest but they are effective. Use them don’t just don’t be afraid of the Raid, the chaos, and overcoming that chaos is what makes it fun.
Acquisition tips
Taken Knights appear in certain areas of the room, learn where these are and have three members of the fireteam – one for each area of the room – dedicated to finding them and dispatching them quickly.
Keep comms clear during callouts and be clear as to what you are looking for and what you see.
Oh and, please learn what the symbols are called. Yes there are a lot of them but calling Pyramid, Darkness can become confusing and could lead to a team wipe.
Caretaker tips
The team stunning the Caretaker should be running melee resistance mods and I would also recommend a movement Exotic. The stun team is perhaps the most important team here especially if those entering the room happen to die due to Pervading Darkness, the Wizards or a fall.
Use ammo finder perks. Seriously, you will be wanting a lot of ammo in this encounter, especially for the damage phases.
While it is possible to run back up the stairs should you fall, if your team can spare it, rather fall to your death so that a revive can get you back in the fight faster.
Exhibition tips
There is a way to cheese this encounter so that only four fireteam members ever have to hold a Relic and one just needs to hold it.
The cheese works like this.
Have one player pick up the Nut relic in the first room, this player will become the holder. Kill the enemies and progress to the next room where the Vault of Glass Relic can be picked up.
The Nut holder must now deposit the relic and the person who is carrying the Nut and dispatching the Taken Knight from here on out picks it up. Clear the room as normal leaving the final Taken Knight alive until you are about to enter the transition room.
When the Nut carrier enters the room they should drop the relic for the holder to pick it up. The Vault of Glass Relic should be deposited into one of the three terminals as quickly as possible upon entering the room.
Now the team simply needs to wait for the Curbed Resonance debuff to run out. When the Curbed Resonance debuff runs out, the Nut holder can deposit, reset the timer and now all three Relic holders should be able to pick up their Relics.
Repeat this for every room and you should have only three people who ever have to run the Relic. There is another cheese below but it is far more complicated.
Rhulk tips
Yes, you can dunk multiple Emanating Force buffs at once but this only serves to create more chaos and confusion. My advice is to go slow, dunk one buff at a time and get to the damage phase that way.
This means you can have one person doing callouts and one person dunking at all times making the encounter more manageable.
When you get to the damage phase elect one person to get Leeching Force and convert it into Emanating Force. This means only one person should be shooting Rhulk’s Glaive. To add to this, if you see a symbol spawn in the middle of the arena (not the pillars on the corner) call it out as we’ve had instances where the person calling couldn’t see the symbol.
Don’t get kicked.

