
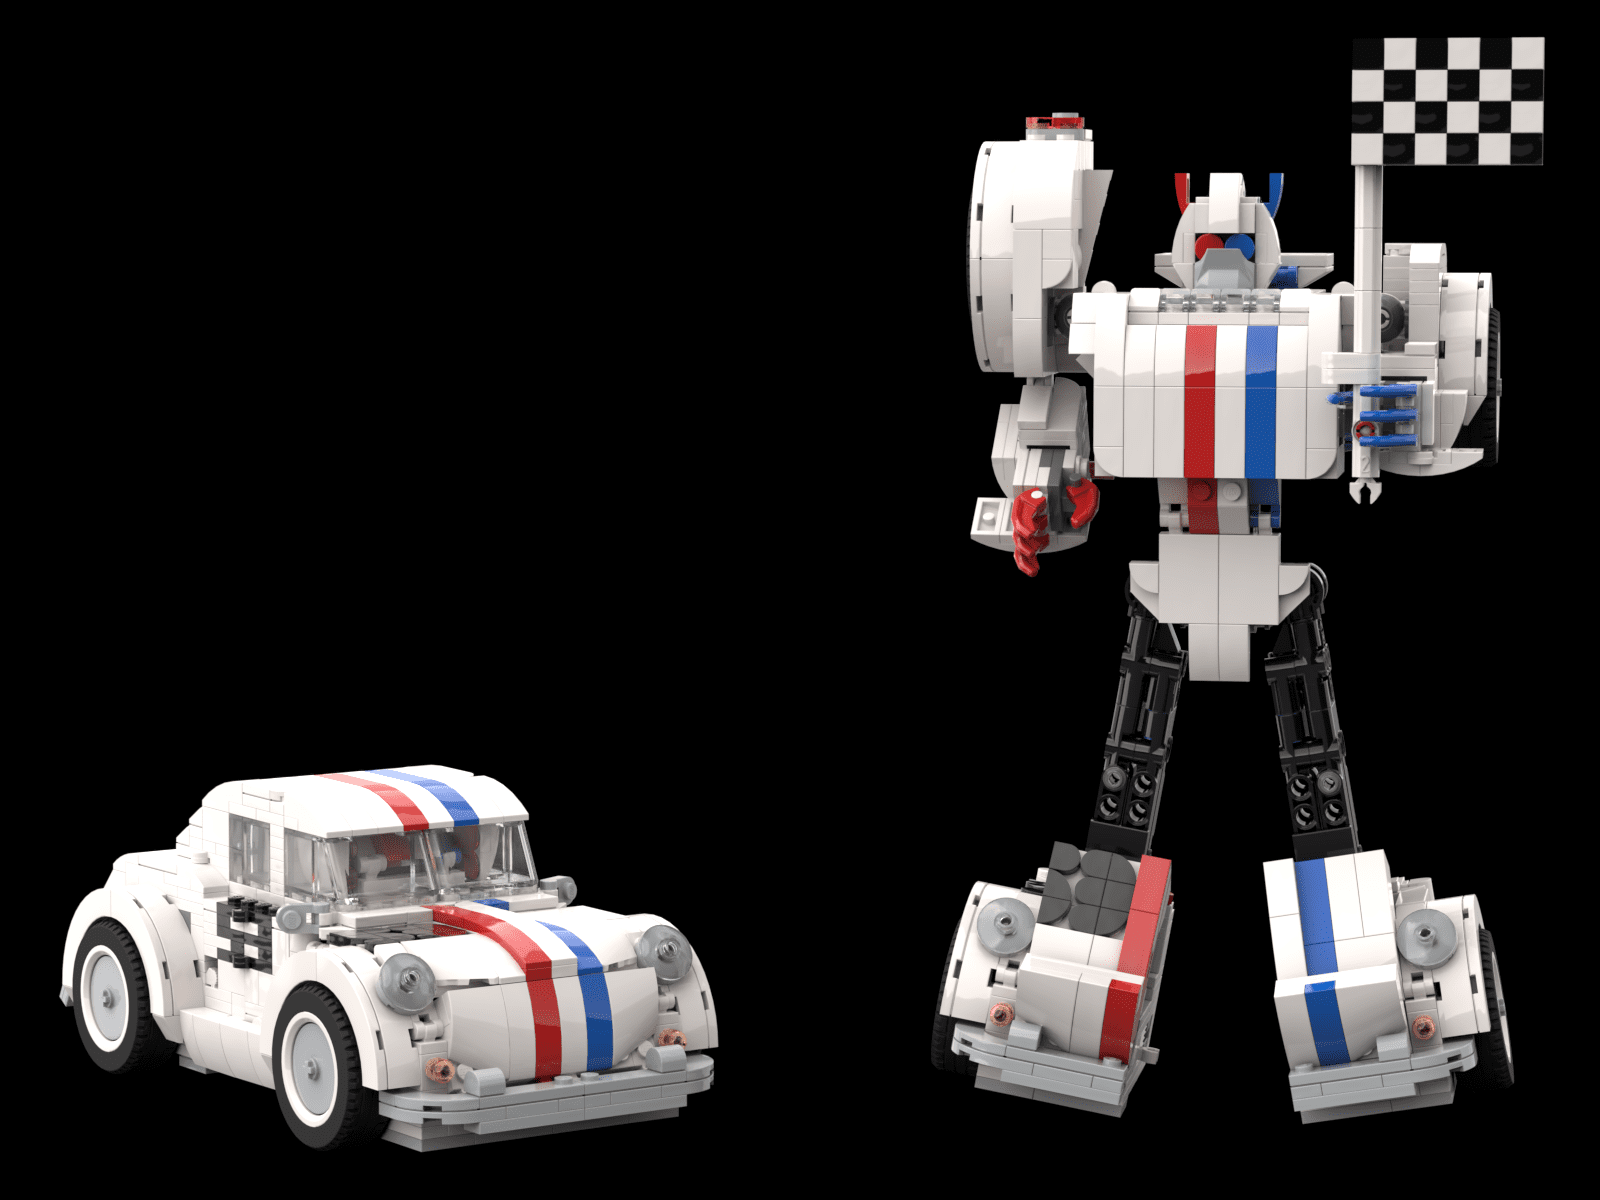
TL;DR – Using LEGO’s Bumblebee as a starting point, I made a transforming LEGO version of Herbie. More than a simple recolour, much of the build has been re-engineered for better articulation and easier parts selection.
The free parts list and instructions are available on Rebrickable by clicking here.
On 1st July 2024 LEGO finally released its second Transformers set in the form of 10338: Bumblebee, creating a natural partner for 10302: Optimus Prime that was launched more than two years ago. As soon as we got official images of Bumblebee I started working on a project that I can finally share with you today: a complete remake of the set to turn it into Herbie.
For many years fans have been asking Hasbro to make a Transformer based on Herbie, with no luck. Given the fact that Bumblebee and Herbie share the VW Beetle as a starting point, this seems like a straightforward adaptation.
The lack of a transforming Herbie is also strange has Hasbro has made Transformers of several other vehicles form pop culture with Knight Rider’s KITT, the Ghostbuster’s Ecto-1, the DeLorean from Back to the Future and more receiving this treatment.
With LEGO we have the ability to do this ourselves, so we don’t need to wait for Hasbro anymore. This article will look at how I did it, and why it took so long to complete.
Redesigning the skeleton
The build and transformation of LEGO’s Bumblebee is all centred around a single piece: this new double ratchet joint, piece 5652 in the company’s inventory. If you’ve built Bumblebee yourself, or you’ve looked at the instructions, you will see that this piece not only forms the spine of Bumblebee, but also his hips and midsection. Bumblebee cannot be built without this new piece as it’s central to the entire endeavour.
That’s a problem for me, however. When I make free instructions for people to replicate builds at home, I want the pieces in those builds to be relatively accessible. For every Herbie that is built a Bumblebee would need to be sacrificed for its joints as it is the only set that uses this new piece right now.
At the time of writing, in the entire world, zero Bricklink stores have the piece available for purchase. While availability will improve with time, there are other reasons to seek an alternative.
Many who own or have played with Bumblebee have mentioned that the transformation feels quite stiff and can be difficult to pull off. This stiffness is made worse by the fact that this is LEGO, so you need to be extra careful compared to regular transformers – pushing a little too hard to overcome that stiffness could result in parts of the build breaking apart. This stiffness is caused by the new piece and its ratchet joints which are doubled up in the build.
Finally this piece essentially gives Bumblebee a hunchback. In robot mode the piece forms an odd shape similar to the number 7 or the letter Z. This causes a joint to stick awkwardly out of the back of the robot creating a huge backpack. The fact that the windows are also placed on the back of the robot add to this backpack and leave the robot looking less than ideal.
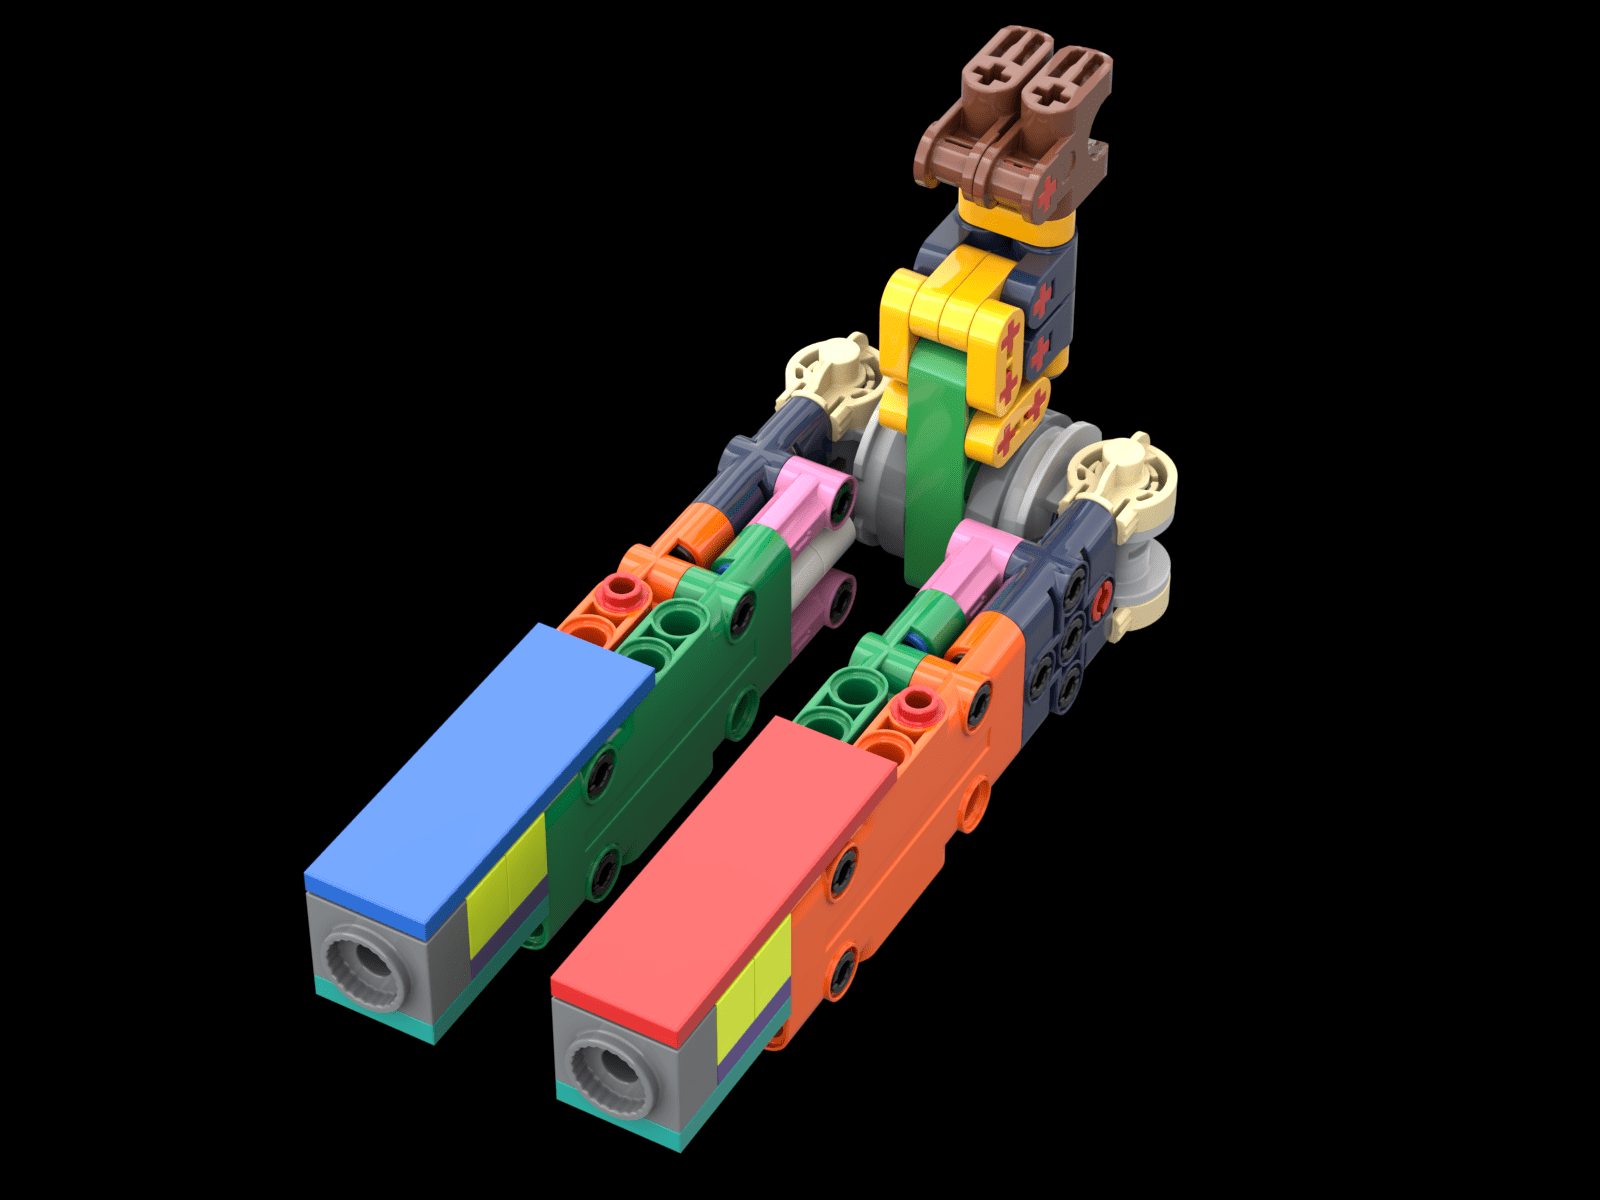
So my job was to replace this new and specialised piece with more common pieces that are readily available, easier to use in the transformation without giving up strength and smaller to avoid the backpack problem. I always knew it would be a big job, but I didn’t expect almost two months of revisions, countless hours of work and lots of failed attempts.
The biggest limiting factor in all of this is space. When Bumblebee is compacted down into vehicle mode, the spine is given just two studs across to fold in between the legs. Two LEGO studs is a tiny amount of space to work with and it really pushed my problem solving skills. Thankfully I had some LEGO friends to help with the designs, but it was an uphill struggle.
The final version – which you can see in the image above – may look simple and it is, using around 100 small pieces in a compact subassembly. But to get to this simple solution was an almost endless headache. Hundreds of prototypes were scrapped for being too large or not providing enough friction to hold everything in place.
By the way those outlandish colours in that image above are just for show in this article. The actual version inside of Herbie is much more subdued and mostly black.
Even when the problem was fixed, there were knock on effects. Almost every single part of the original Bumblebee build had to be modified to accommodate this solution. Looking at Bumblebee and Herbie side by side and it may be difficult to see that, but all the hard work exists under the skin. Herbie may have started out based on Bumblebee, but the final product is its own beast.
I will readily admit that this solution isn’t perfect and can come apart after a few transformations, so you need to routinely tighten parts of Herbie as you play with it. This is a bit of a fragile project so extra care is needed when handling it.
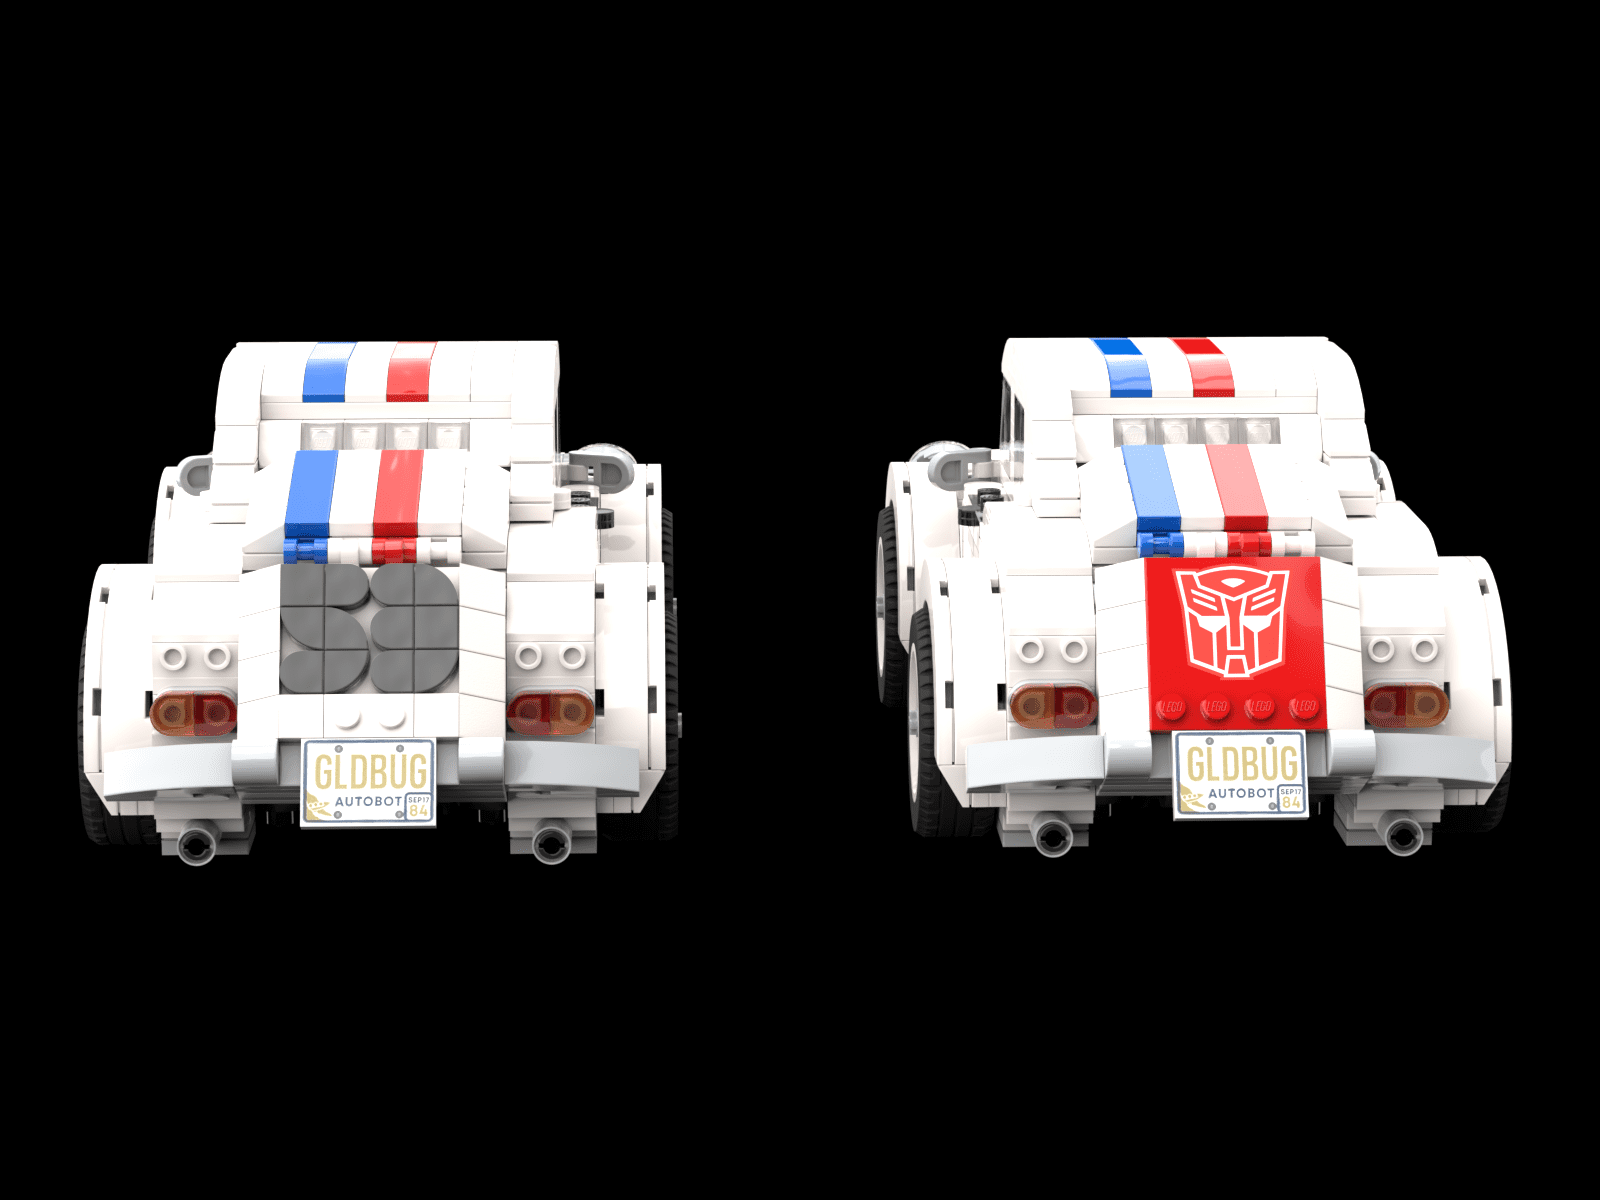
The famous 53 and racing stripes
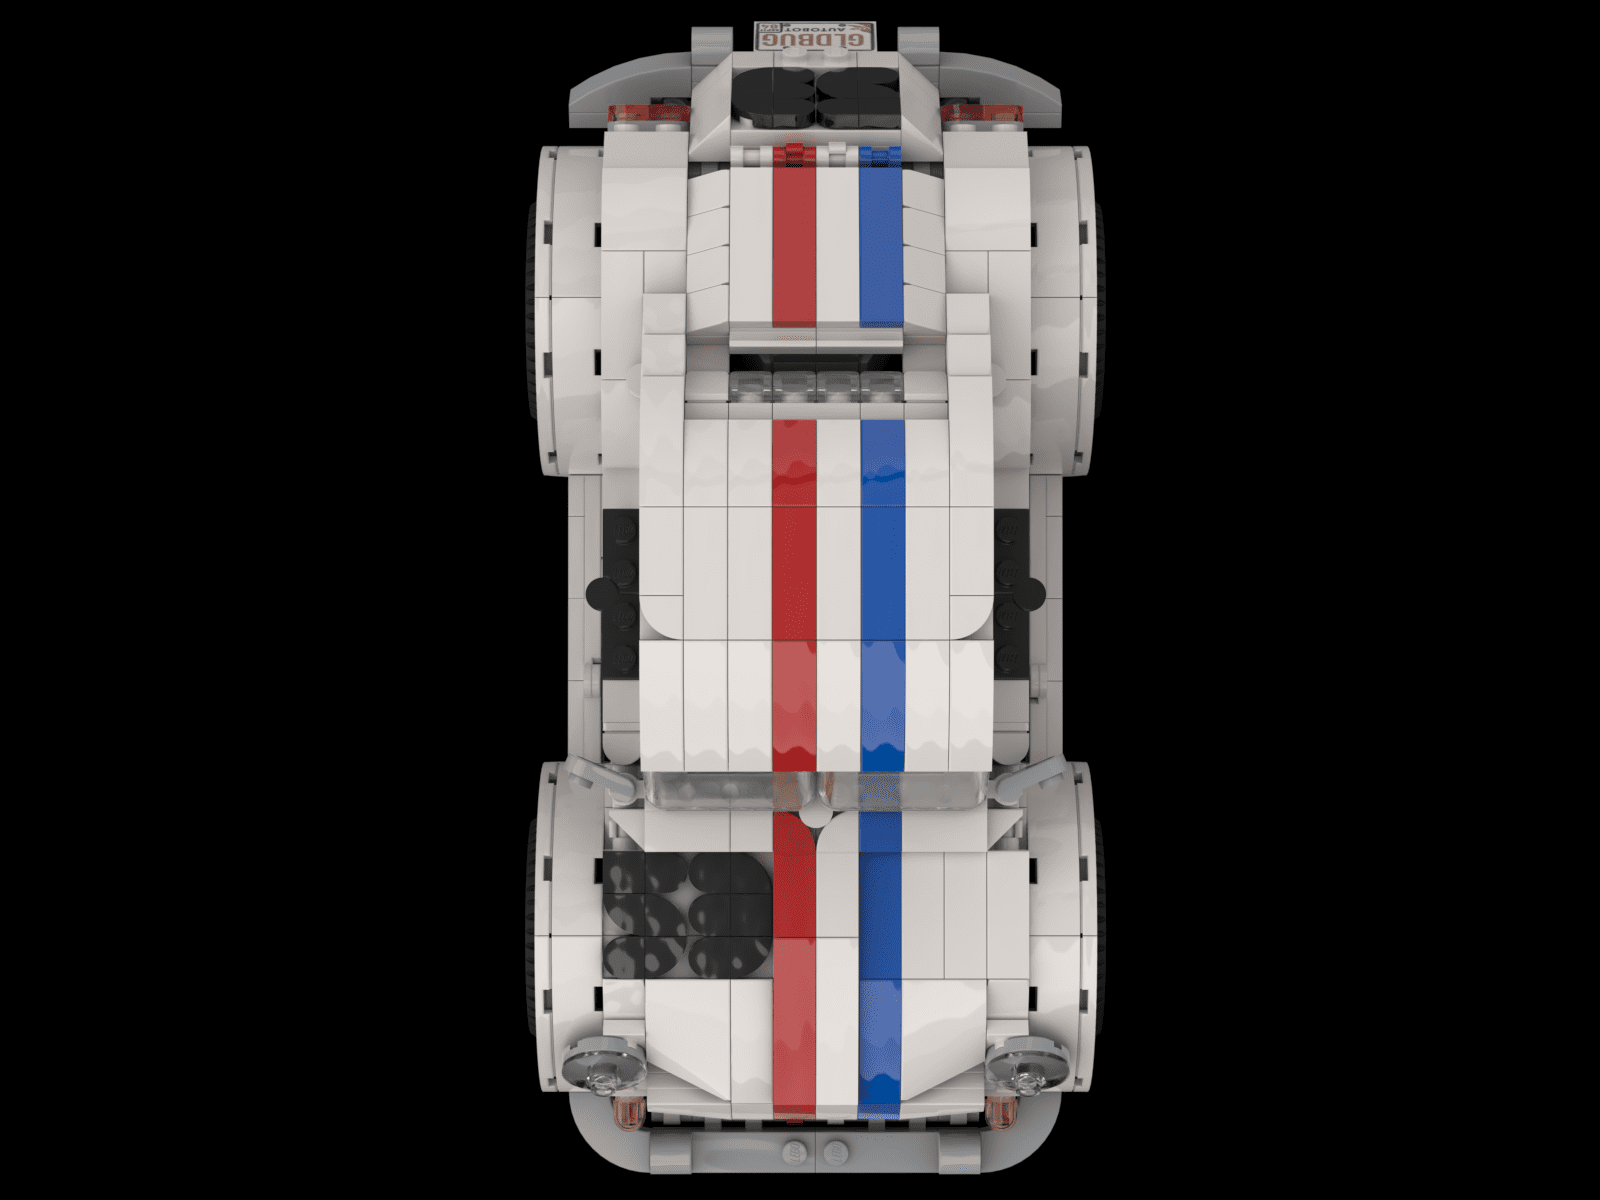
Over the years many LEGO fans have made their own Herbies… but they’ve also often cheated to do this. By that I mean using custom stickers, paint or other means to replicate the 53 and the racing stripes which make Herbie so recognisable.
For my LEGO version I wanted to do none of that, focusing on replication with LEGO pieces alone.
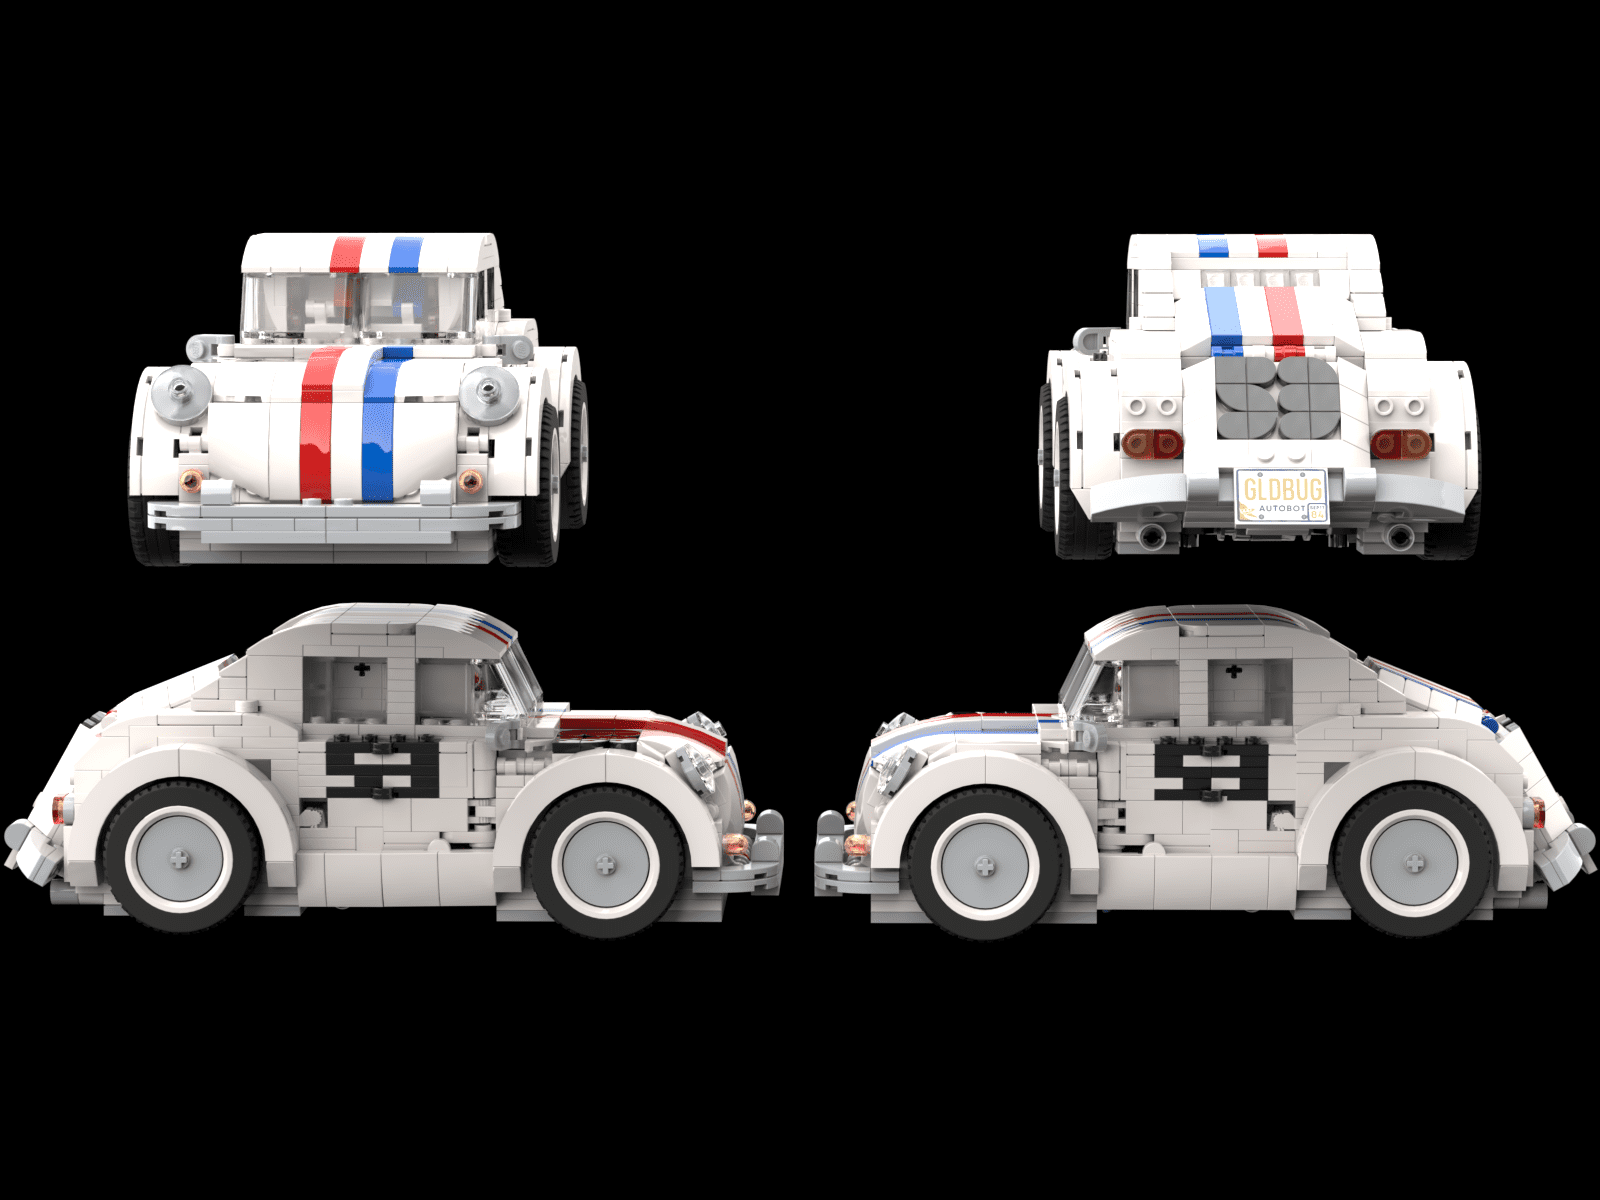
I started with the racing stripes first, as their position would dictate how much space I had left on the surface of the car to do the 53. This was easy enough, but it required swapping out quite a few pieces. Because each line of the stripe is a single stud long vertically, any piece stretching over that line horizontally would need to be colour swapped. If the piece was larger than one stud, it would need to be broken up, which saw quite a few changes happen.
This had the biggest impact on the end of the car. The “boot” section (which hide’s the robot head) is made up of two large subassemblies, and both of these needed to be remade from scratch to accommodate the stripes and eventually the 53.
With the stripes built in I could focus on the 53. For this I took inspiration from this post which sought to replicate both letters and numbers in a 3X3 stud grid. Unfortunately even this size was too large for the front and back of the car, both of which needed a 53. Thankfully someone in the comments had simplified the numbering system into a smaller 2X3 stud grid, which was just small enough for my needs.
I still had two more 53s to build: one for each side of the car. This was on the easier side as I could simply do some rebuilding to the two doors to make a plate-built 53 on each door. It’s not perfect as there’s no gap between the two number, but with the available space this is as good as I could do.
Lastly, for those who hate Transformers without a side to fight for, you can replace the back 53 with an Autobot insignia. This is a printed tile from Optimus Prime and an official LEGO piece (6179pb223) so we’re sticking to my goal of only using LEGO parts for the project.
The last bit of decoration in this build is a sticker, but it’s an official one from LEGO. The Bumblebee set comes with two licence plate sticker options: “BMBL84” and “GLDBUG”. LEGO gives you both as well as the extra pieces to apply the stickers, so you will always have one spare to give to Herbie if you choose to. I went for the GLDBUG one which is what you will see in the renders on this page.
A weapon for the friendly Transformer
Almost all official Transformer come with accessories, usually in the form of a weapon or two. For Herbie I really couldn’t think of any accessory or weapon to pair with the build. I went so far as to even watch through the 2005 movie Herbie: Fully Loaded for some inspiration, with no luck.
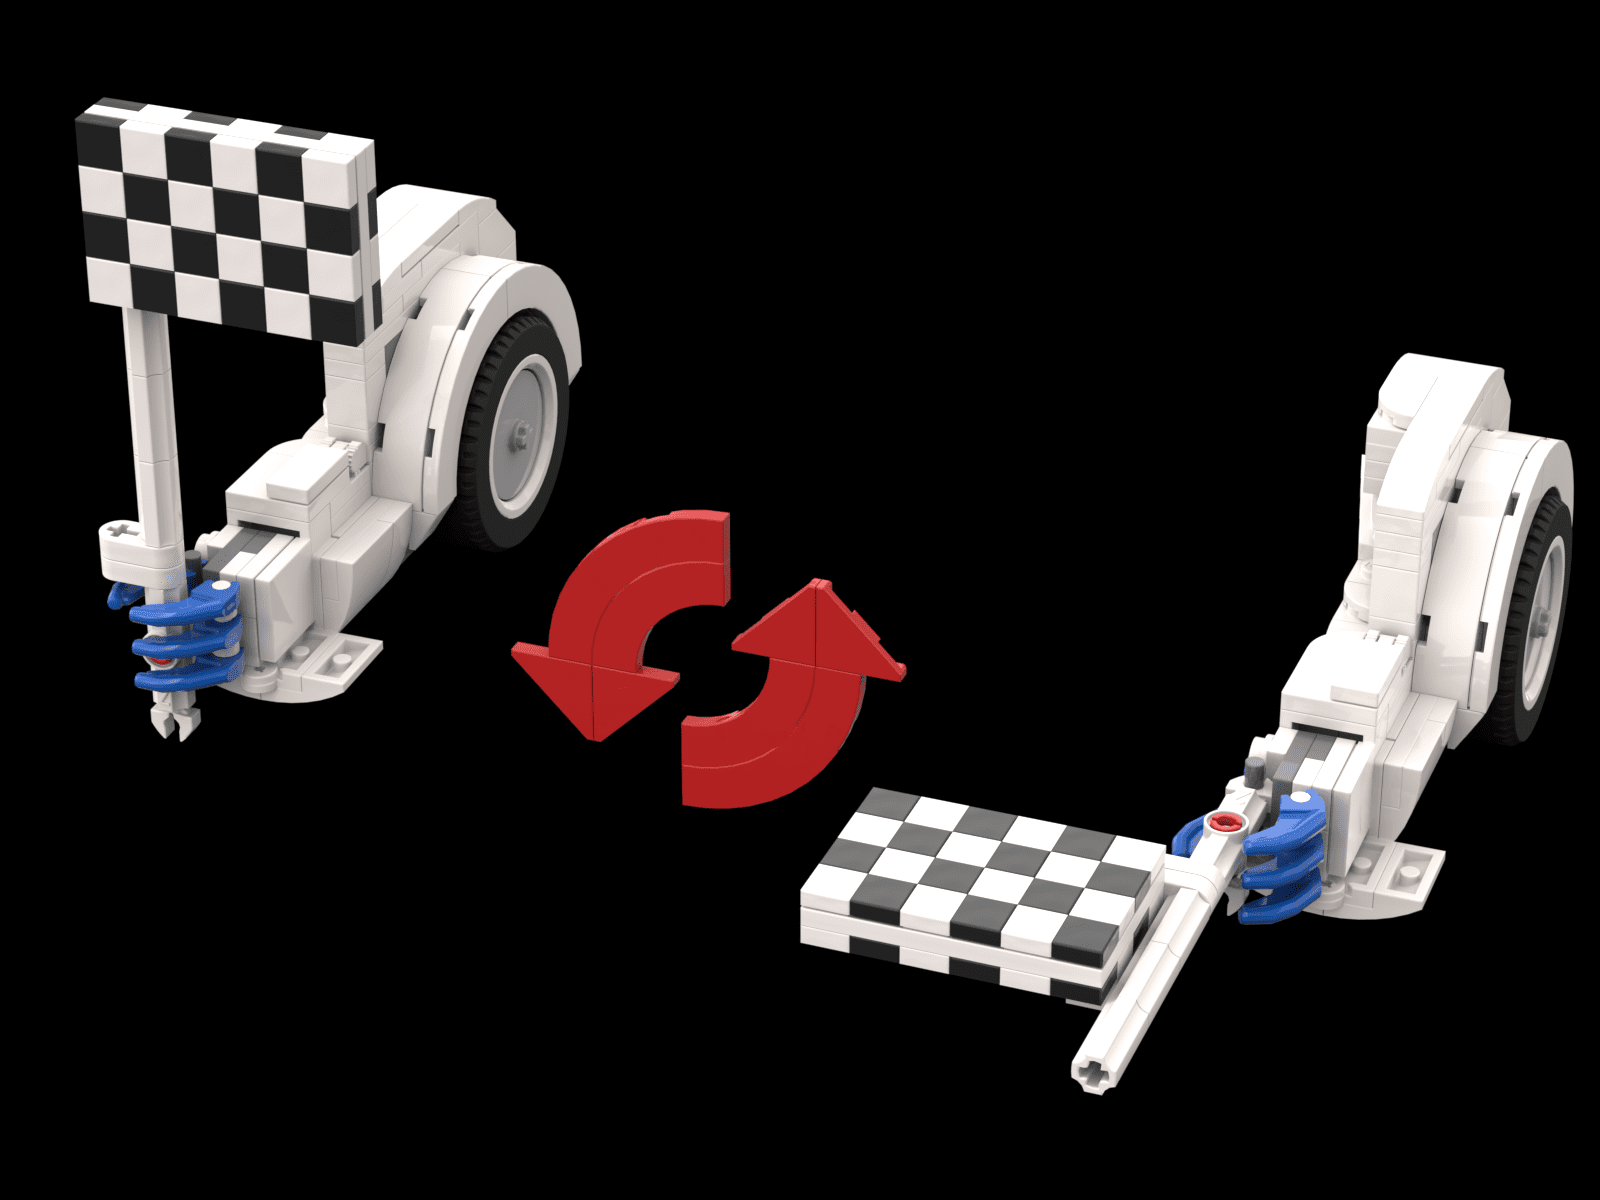
Inspiration instead came from an official toy of the Transformer Cosmos. The Legacy Velocitron Speedia 500 Collection version of Cosmos features a chequered flag as his accessory, which is perfect for the racecar Herbie. Cosmos’s accessory isn’t all fun and games as the flag can be quickly converted into a type of gun, something I would also replicate.
My flag / gun fits into Herbie’s hand with a clip, the same way Bumblebee’s blaster fits into his hand in the official set. Hold the accessory vertically and you have a chequered racing flag, but turn it horizontally and it becomes a gun. The flag itself can by moved around to more resemble a box magazine – the same as Cosmos’s accessory – so Herbie can look even more menacing.
The final result


After all that work in the design phase, the last step was buying the pieces to make it for real. Aside from wanting a Herbie of my own, this was crucial to ensure that all the changes I made to the Bumblebee design would work in real life.
LEGO’s CAD design tool, Studio, is a fantastic space for building digitally, but it can falter when displaying true tolerances and overlaps.
In buying the pieces for myself I did find that some of them are harder to get. I did my best to swap these out for more readily-available alternatives, but some were impossible to replace. On the Rebrickable page please check out the section in the details page for advice on buying pieces and what can be swapped out to save money or change the look of Herbie.
Lastly it’s worth mentioning that, for most of Herbie’s life, he did have knees. The original Bumblbee was criticised when it first released for not having more articulation, especially in the legs with a lack of knees. I wanted Herbie to have this but failed to make it happen.
The problem was, unfortunately, slack created by LEGO’s parts. While LEGO is known for its tight tolerances, larger builds can overwhelms those strong connections. In creating my experimental knees I used the largest joints LEGO makes that could fit into the thin legs – the ratchet joint pieces 44225 and 44224.
While these two pieces are plenty strong enough to support the entire build and provide more articulation, they have major downsides. In vehicle mode there’s too much slack between the locking states of the ratchets, leading to the vehicle drooping downwards. While transforming the extra joints make the process much more difficult, and only in robot mode are they mostly unproblematic.
That being said the large feet make any poses you can get with knees less likely to work as intended.
With all of this in mind I decided to axe the knees in the eleventh hour. It really sucked to cut this feature and put countless hours of work on the trash, but I thought it best to make the overall project more stable and less frustrating.
Not to beat myself up too much, the entire Bumblebee design hinges around having solid legs, so any attempt to add knees was really a doomed endeavour.
Despite this I am still incredibly happy with the final result and the fact that anyone can make their own relatively easily.