
Just a few days ago Hasbro revealed comic-accurate versions of Grimlock and Shockwave and the latter is packaged with a rather odd and strangely dark accessory: the head of Optimus Prime on a display stand.
Its inclusion is a nod to events in the comic where Shockwave uses Optimus Prime’s head for his own evil purposes and, while that happened decades ago, I won’t spoil the specifics, but for those who want it here’s a brief explanation from /r/Transformers.
See the image below for Hasbro’s toy incarnation of this event, and the comic panel from TFWiki. The comic panel is even included on the door of Shockwave’s packaging. As you can see Hasbro has simplified things a bit with less wires all over the place and saved on different plastics / paint costs by making the little support arms the same colour as the top part of the base.

Recently I replicated an event from the Transformers comics by giving Optimus Prime Megatron’s arm and cannon (see how and why I did that by clicking here) so I thought this was a perfect opportunity to do it again.
And not to bury the lede, I have made free instructions which you can find embedded at the bottom of this article or on LEGO instruction sharing site Rebrickable. Also on Rebrickable is the parts list for the project.
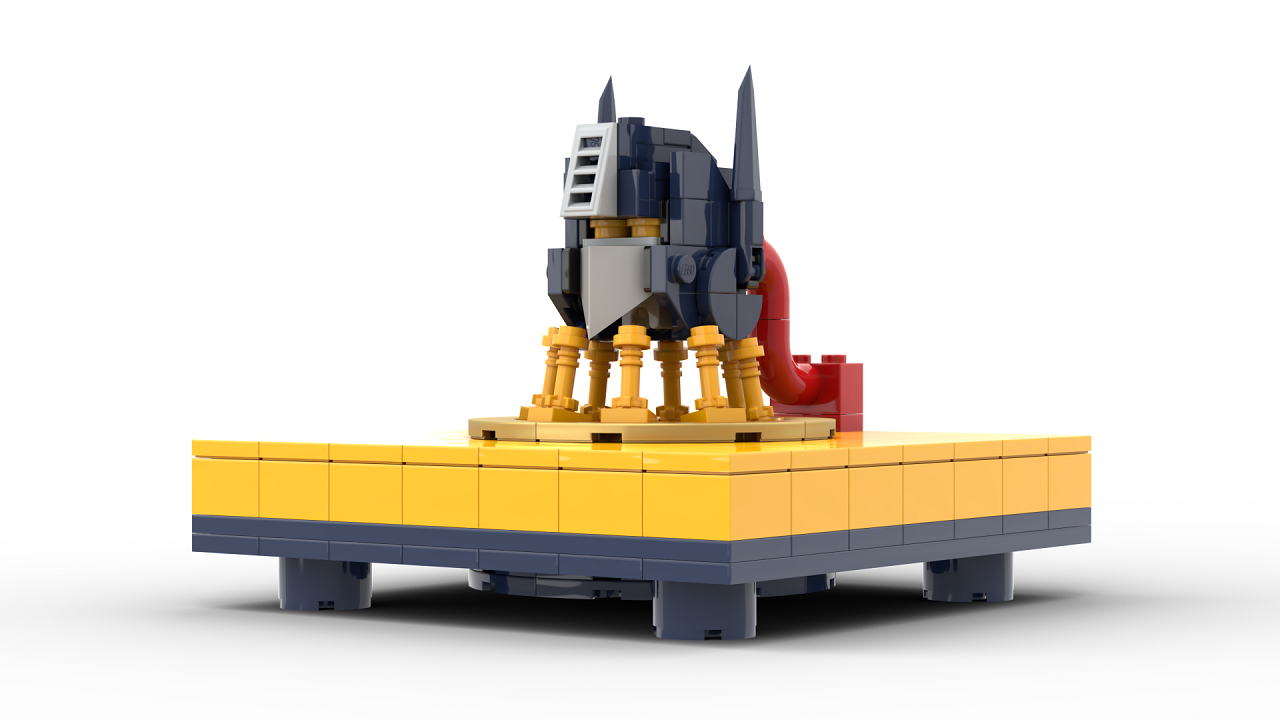
For those not in the know, LEGO released a G1 version of Optimus Prime in the form of set 10302: Optimus Prime so we already have Prime’s head made for us, but not really.
The build of Optimus Prime’s head, directly from LEGO, makes use of three pieces that are only available in that set. The printed tile for the eyes, the printed tile for the head crest and the face shield are all still exclusive to that set so grabbing them for our build could be pricey or time consuming to track down.
For people who already own the Optimus Prime set, I also didn’t want you to have your set incomplete for this display, so instead I designed around the problem.
The head crest and face shield were replaced with some relatively common pieces that fit very well here. As for the eyes I simply swapped them for two round LEGO tiles. Not only are these also common pieces, but we can use a shade of yellow here as they are more accurate to the comic and the accessory that will come with Shockwave.
These solutions aren’t entirely new as I used the same tricks when I recoloured Optimus Prime to make Nemesis Prime and Ultra Magnus.
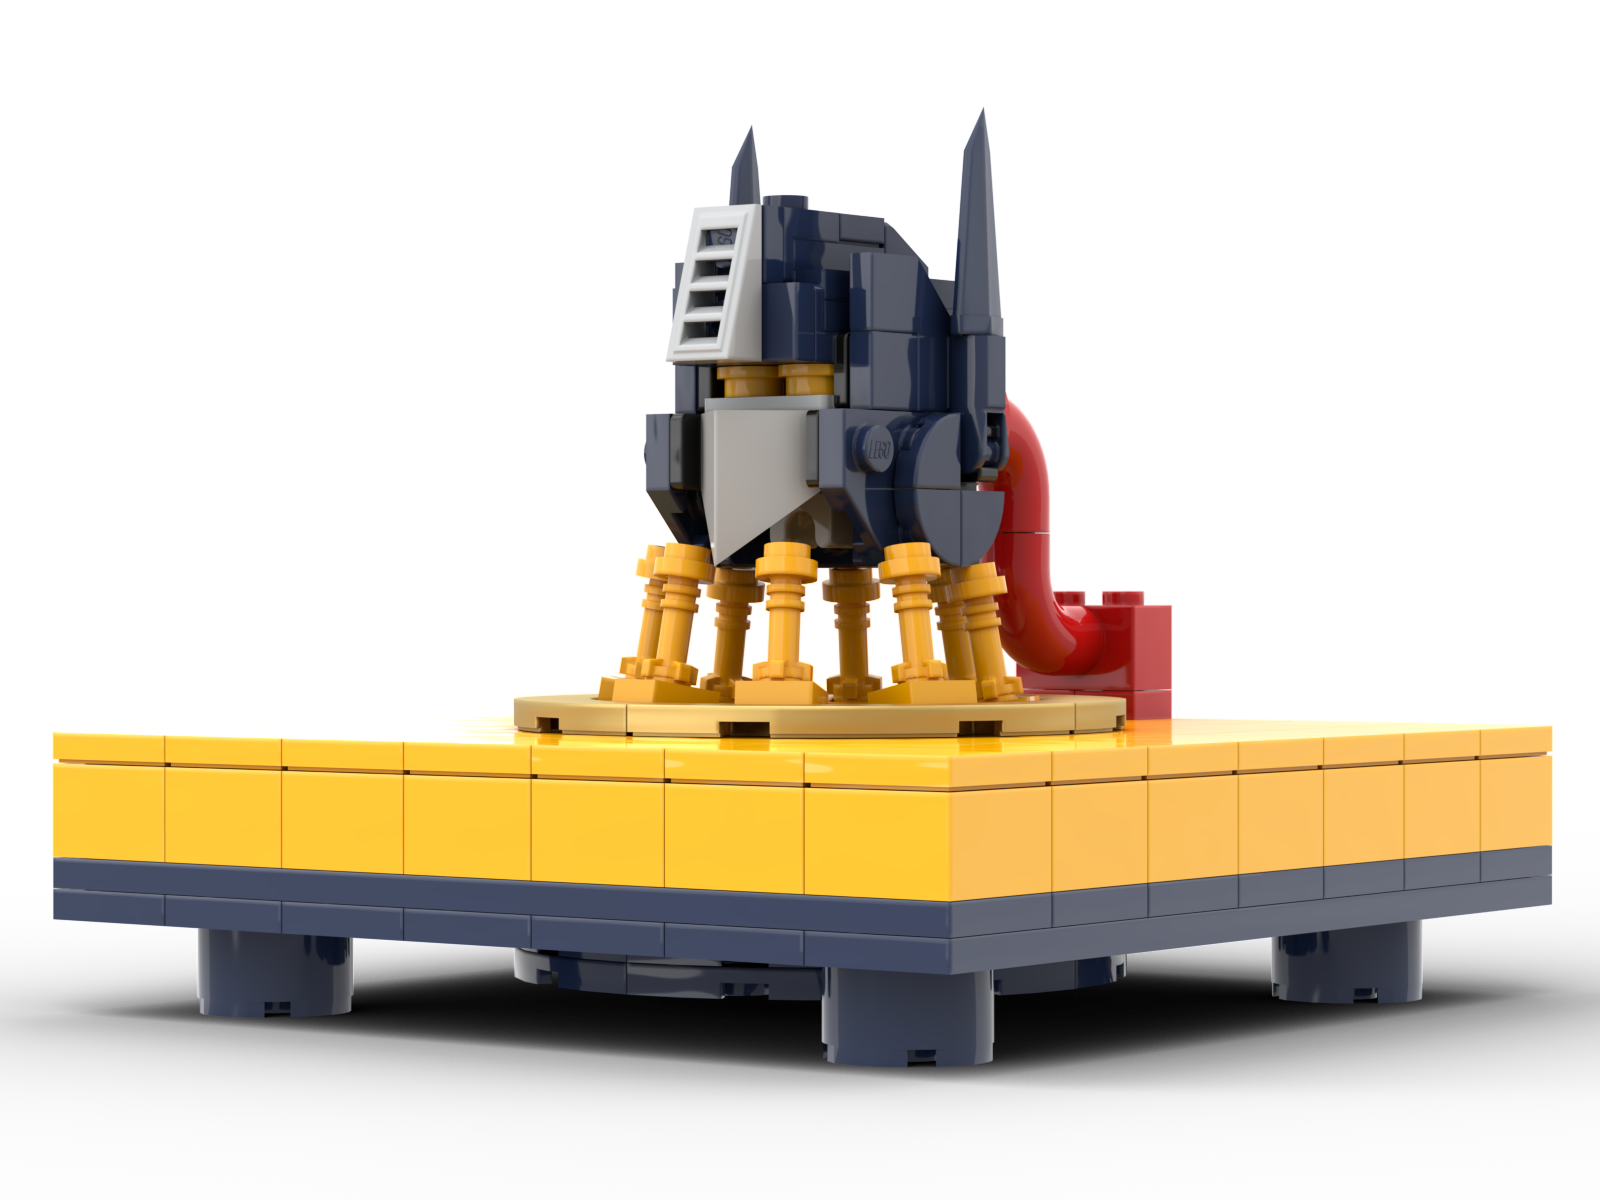
With the head done we can get to the meat of the build in the form of the display base. Despite just being a fancy box it took a lot of design work to make it look nice and for it to be relatively strong.

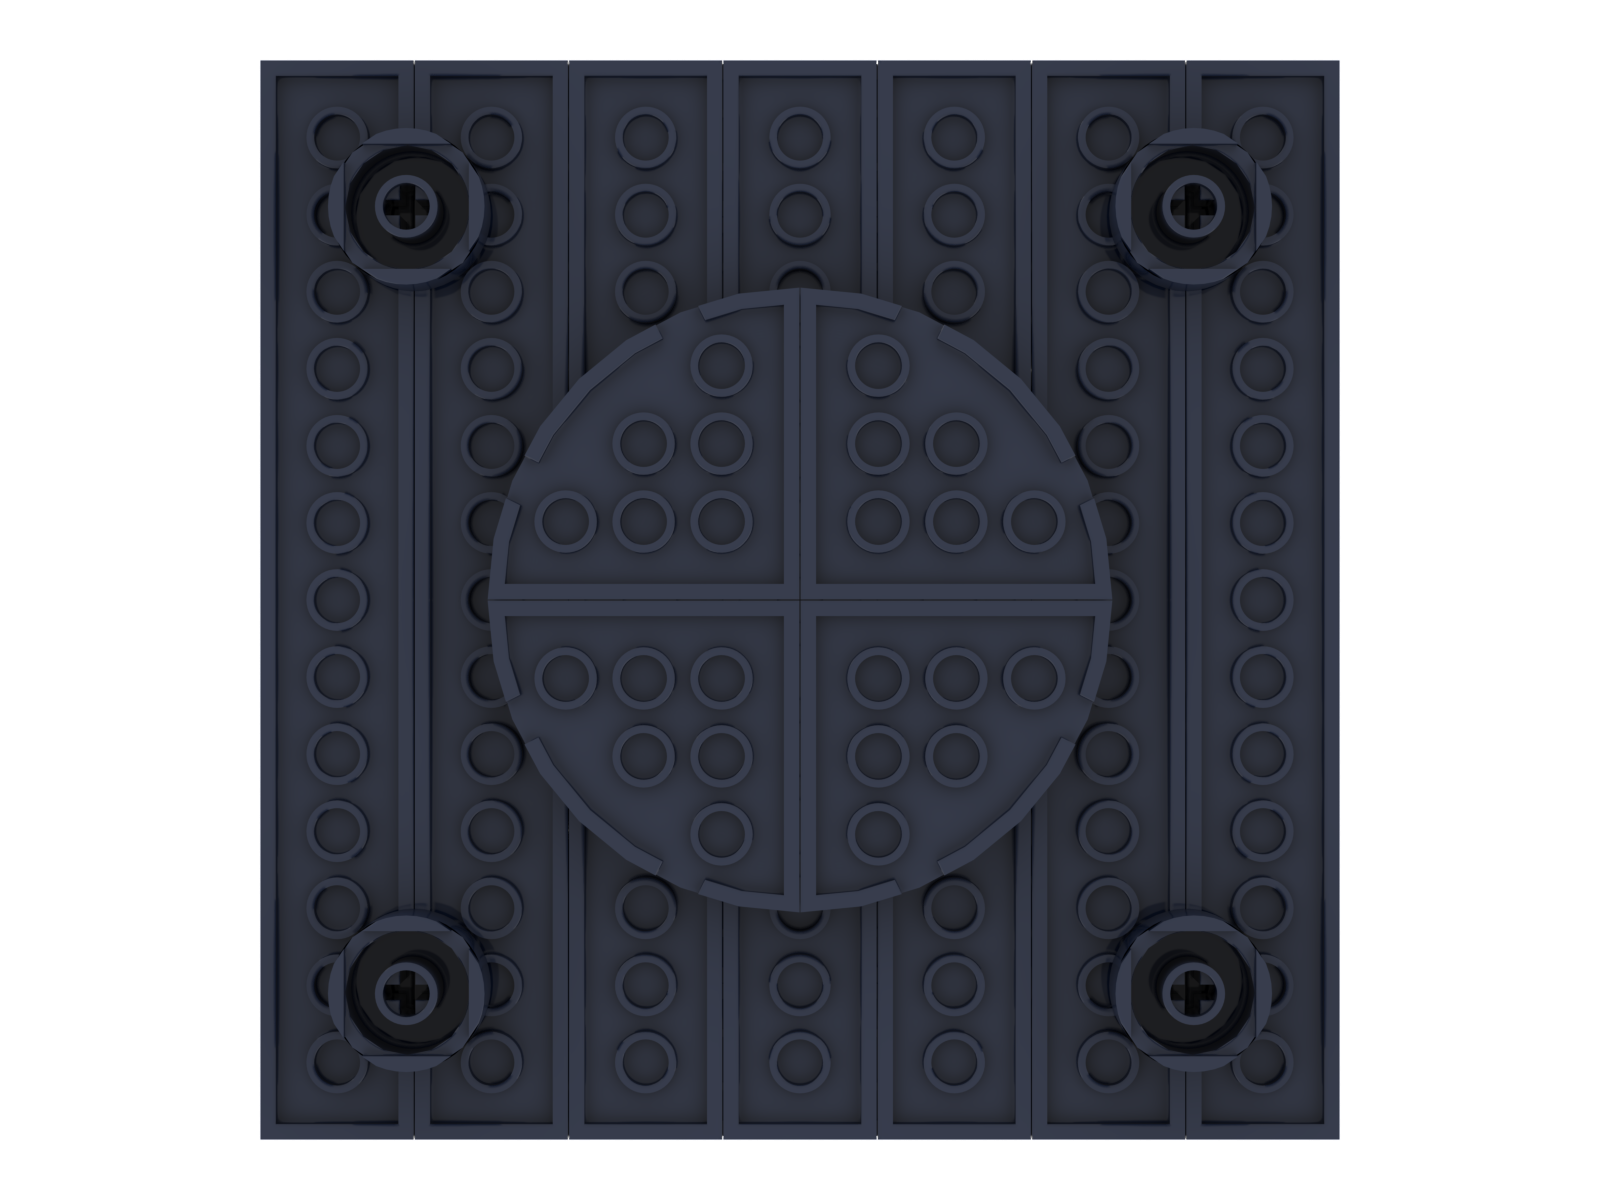
The dark blue section of the base was relatively easy with large plates and some rounded bricks under them for legs. I even included some rounded plates in the centre, on the bottom, as it seems the upcoming toy has these too. With that Shockwave toy only set for release later this year I had a scant three images in total to do this build, so I did a little guesswork about the bottom. Here’s a clearer picture of what the bottom of the build looks like.
The top portion of the display base is where things get complicated. As you can see in the image above there are distinct panel lines that I wanted to replicate, but couldn’t copy exactly due to limited pieces offered by LEGO in the colour we need.
That colour is what LEGO calls “Bright Light Orange”. This colour, to my eyes and the eyes of people who saw this project early, looks more accurate to the toy compared to LEGO’s standard Yellow.
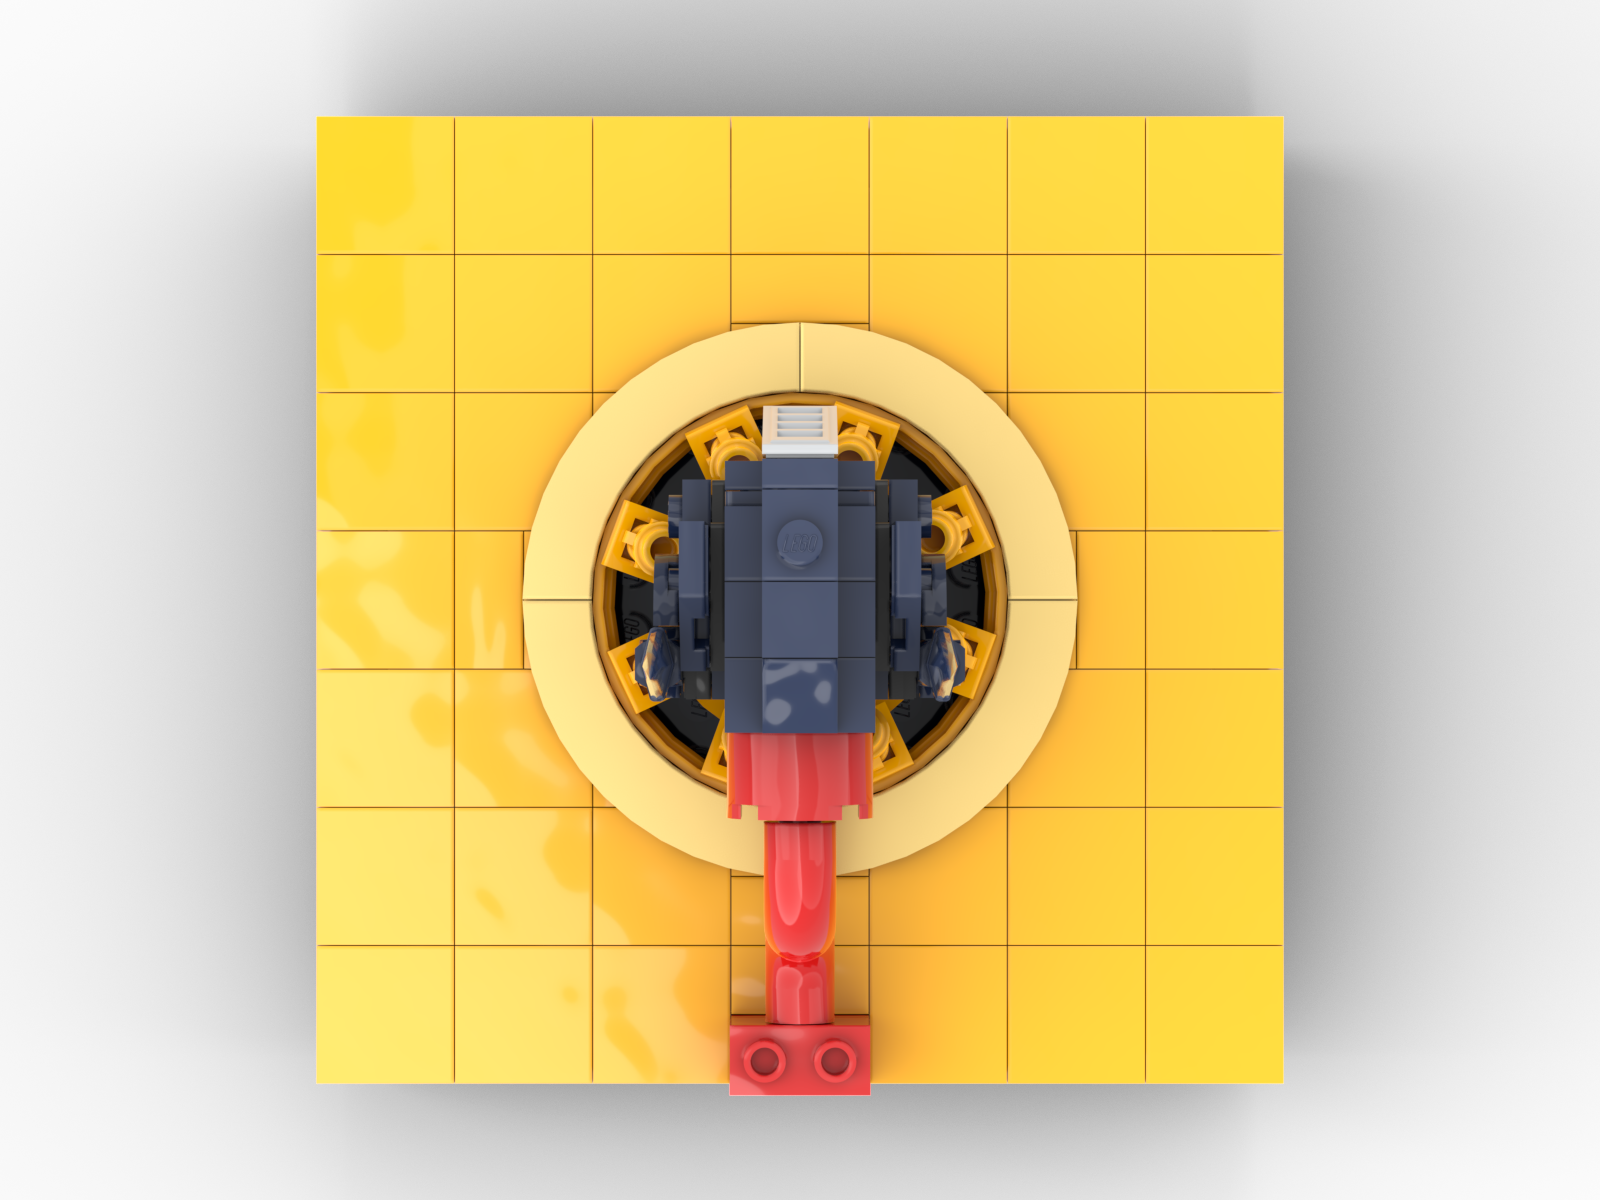
While I couldn’t replicate those panel lines exactly, I went with a grid pattern made of 2X2 stud divisions. This solved the piece availability problem and mimics the very 80s grid look that was on much Transformers G1 packaging and other media.
Breaking up that grid to facilitate the circular opening in the middle of the floor was a challenge. I decided that the circular opening would be a dish piece mounted upside down to create an inverse dome, just like the toy. This was encircled by some fancy Metallic Gold rounded tiles which just so happen to be the same size as the dish.
To make the circular area blend into the square grid, I used those rounded tiles to hide where square and circular meat and where the connection may not look as good.
While the dish is a great inclusion and it was now carefully meshed into the grid, it was also the source of the biggest headaches in the project – those arms that stick out from the bottom and attach to the underneath of Optimus Prime’s head.
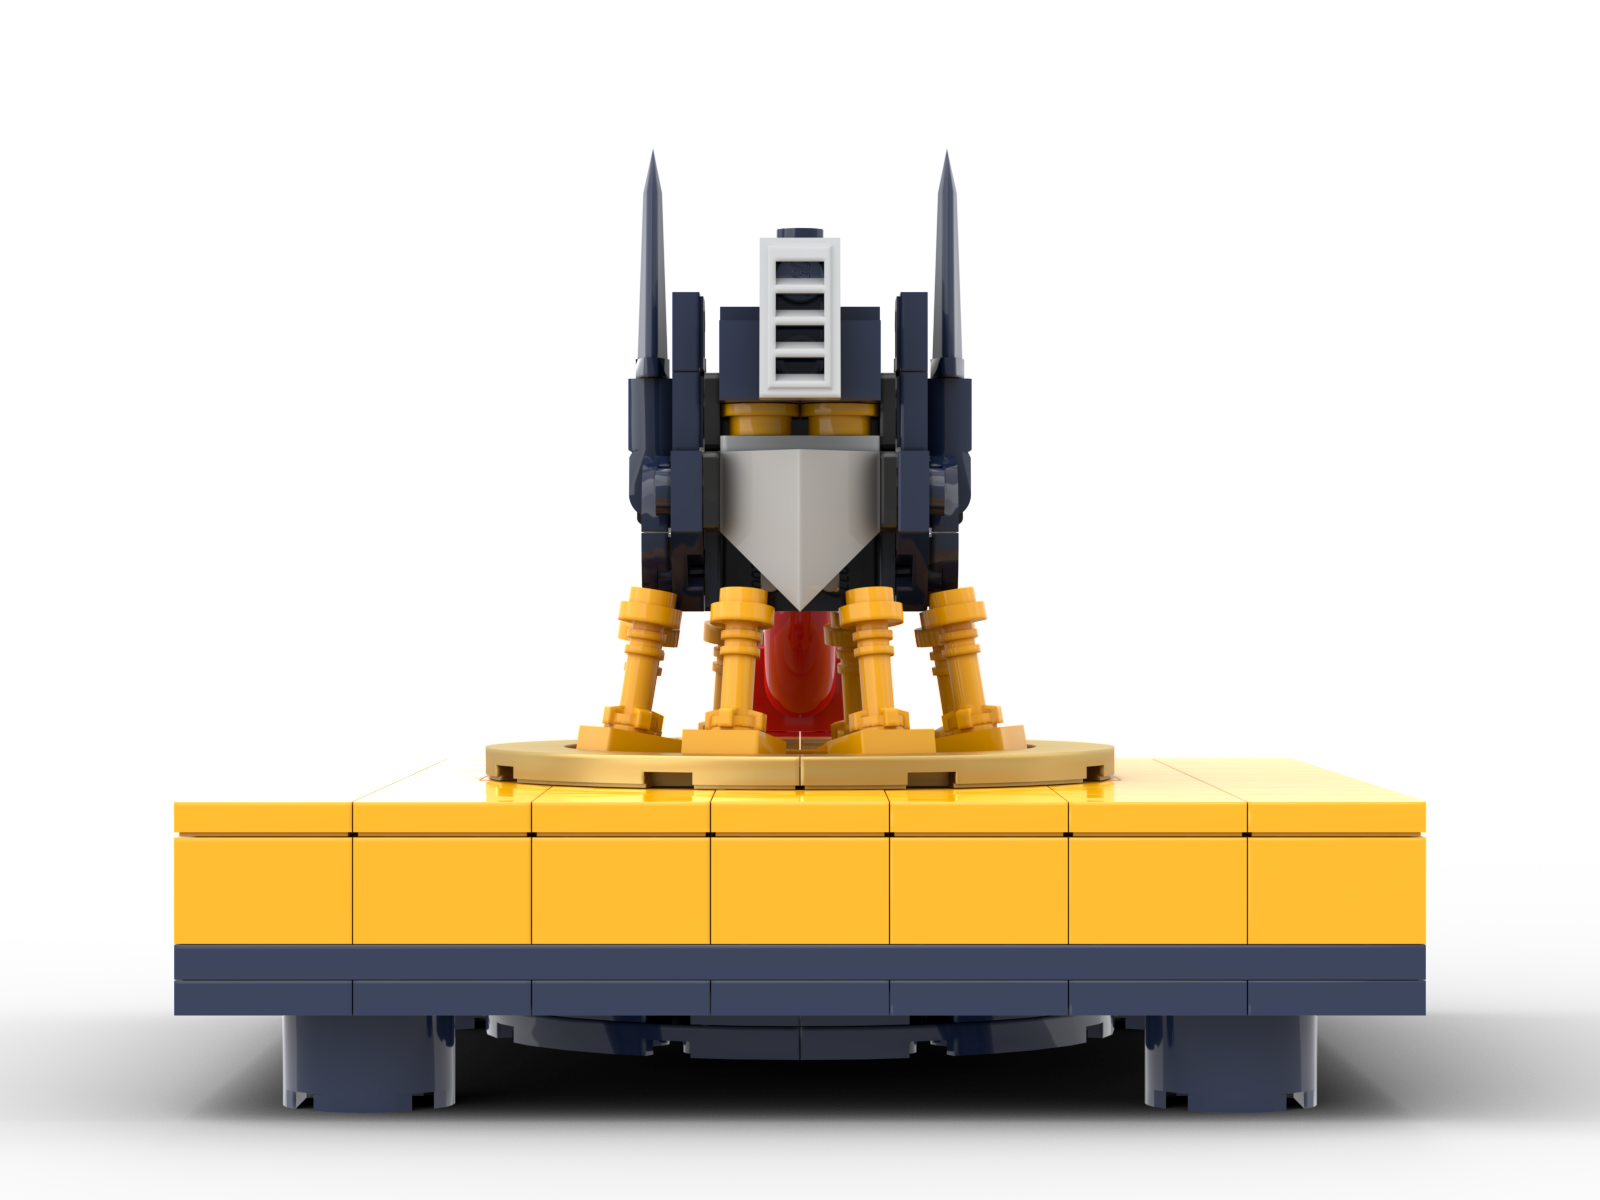
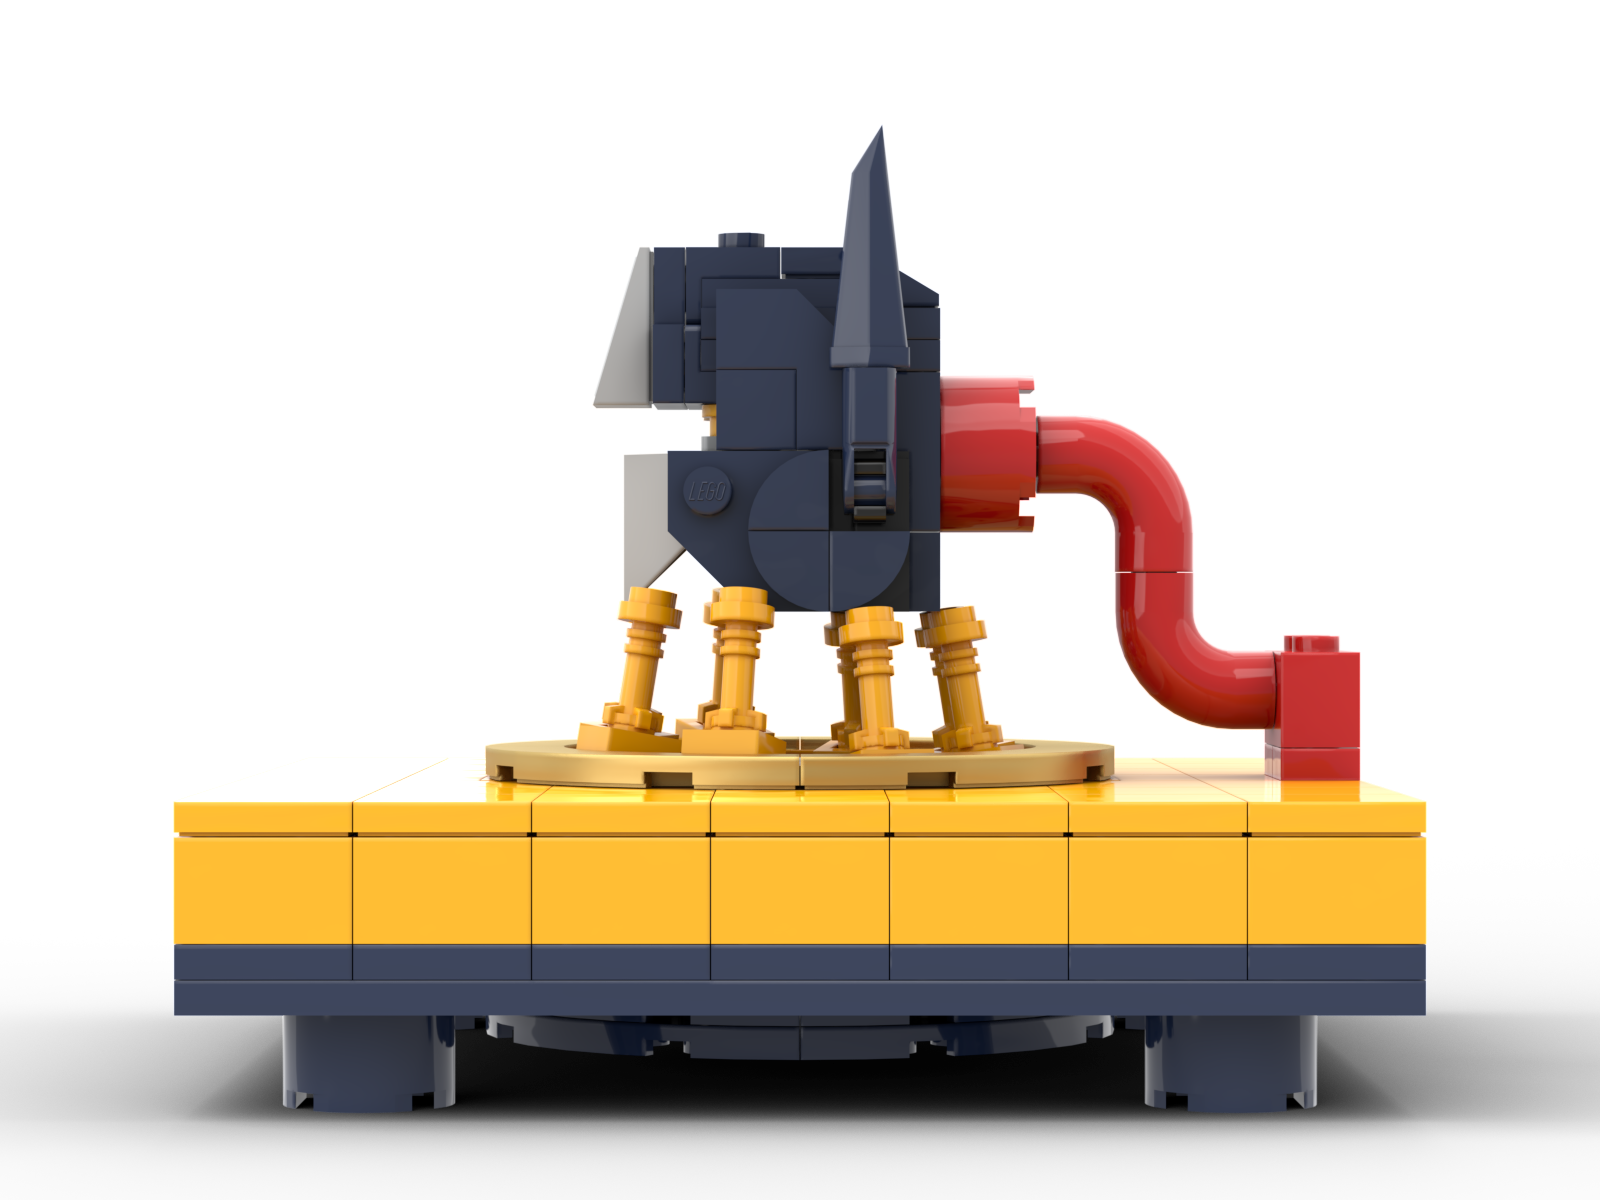
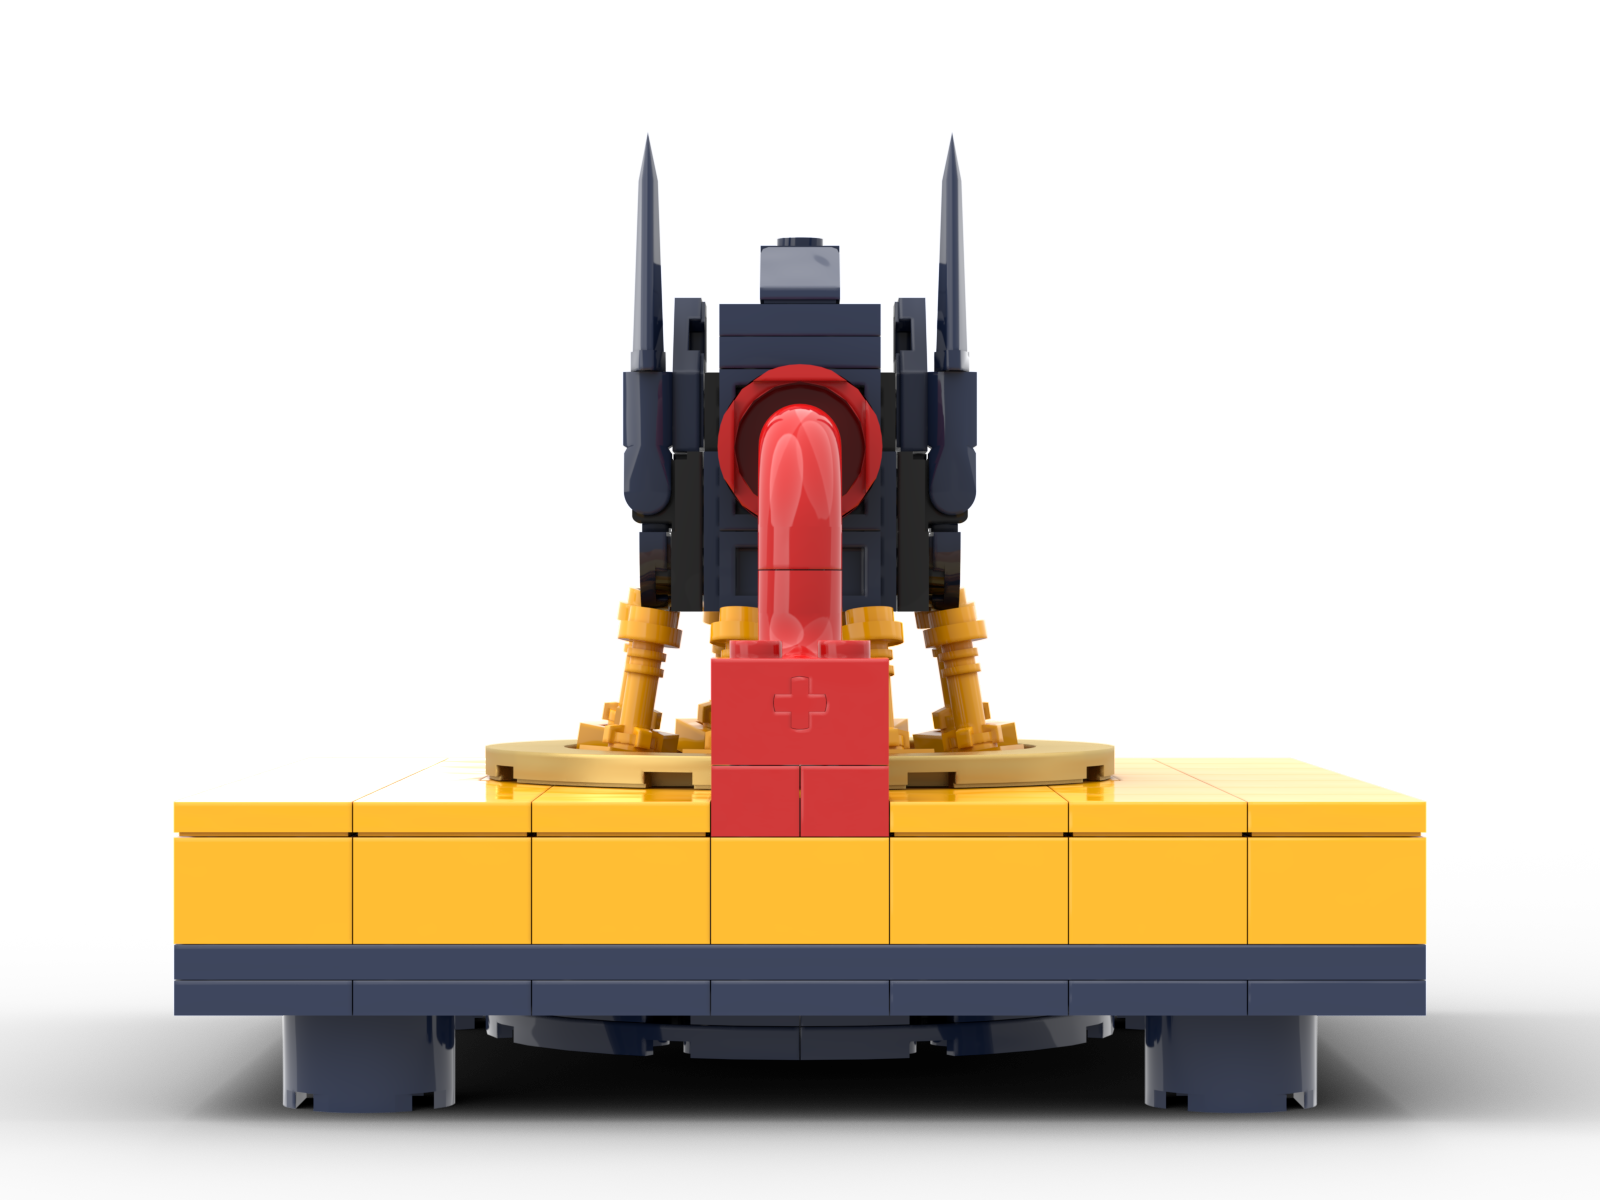
In the comic panel it seams that these arms are supporting the head with the big wire conduit simply connected in, but in the toy the wire actually supports the head and the arms float under it. I decided to take this same approach with the LEGO version as it just makes more sense for something that needs to exist in real plastic.
The problem is that the dish has no connection points in the right places. While I could have made some super complex solution for arms to pop out between the opening in the dish – something LEGO has never done in the decades that this piece has existed – I just used some illegal building techniques.
The arms of the dish perfectly connect to a LEGO clip, creating a mounting point for the arms which I made with just two pieces – a 1X1 clip tile piece and a bar element that is usually used as a Star Wars lightsaber hilt. I made eight of these arms due to the fact that the dish has eight spokes, but you can leave out two of these if you want it to match the toy’s six arms.
I’m still not entirely happy with the solution and I would have preferred to use this telescope piece as the main part of the arm, but I was running out of time to complete this project and said telescope piece doesn’t come in Bright Light Orange or Yellow.
Finally for the way to mount the head to the stand I needed that red wire part. I originally wanted to use LEGO’s Technic hose because they come in red and look exactly like the toy, but these pieces are flexible and wouldn’t be able to support the head.
Instead I used the “elbow macaroni” pieces as they’re rigid and have axle holes for a strong support. This terminates in axle connections on the base and the head of Optimus Prime making a solid but still thin connection that still looks decently like some wire conduit, albeit one that’s smooth instead of ribbed.
And that’s it! To make your own decapitated Optimus Prime head with the display base, check out the instructions below or on Rebrickable where you will also find the parts list.
Also on Rebrickable I provide some piece swap suggestions if you are struggling to find some of the elements needed.

